

Введение в атрибуты событий HTML
В этой статье мы подробно обсудим атрибуты событий HTML. События - это действия, которые выполняются в результате действий пользователя. Например, когда пользователь нажимает клавишу на клавиатуре, чтобы прочитать данные, это называется событием клавиатуры. Эти действия выполняются, когда пользователь просматривает веб-сайт и выполняет нажатие кнопки или когда страница загружается при нажатии кнопки обновления, когда браузер выполняет манипуляции с страницами, все эти действия называются событием. Здесь мы пройдемся по базовому пониманию событий и того, как оно работает в браузере над действиями пользователя. Во всех окнах браузера происходят различные типы событий, которые описаны в следующих разделах.
Топ 5 атрибутов событий HTML

Существует другой вариант событий, доступных в HTML. И все эти события имеют небольшой блок кода, называемый обработчиком событий, который срабатывает при выполнении действия события. Они прикреплены к элементам HTML. Обработчики событий или прослушиватели событий играют важную роль в атрибутах событий HTML. Давайте рассмотрим различные типы атрибутов событий, которые глобально объявлены и применены к элементам HTML, а также подробно описали их работу. В основном используются четыре основных атрибута события. Они есть:
- Окно Событие
- События формы
- События мыши
- События клавиатуры
- Перетащите события
Мы опишем все эти атрибуты один за другим на примере. Сначала мы пойдем с.
1. Оконное событие
- onafterprintEvent: этот атрибут поддерживается всеми тегами Html и работает, когда страница начинает печататься, и имеет сценарий с одним значением. Вот пример кода HTML. Этот пример показывает, что при нажатии кнопки печатается сообщение, которое печатается в диалоговом сообщении.
Код:
Windows onafterprint Event

Windows onafterprint Event
This attribute works in IE and Mozilla

function myfun() (
alert("Document is being printed");
)
Windows onafterprint Event
Windows onafterprint Event
This attribute works in IE and Mozilla
function myfun() (
alert("Document is being printed");
)
Windows onafterprint Event
Windows onafterprint Event
This attribute works in IE and Mozilla
function myfun() (
alert("Document is being printed");
)
Windows onafterprint Event
Windows onafterprint Event
This attribute works in IE and Mozilla
function myfun() (
alert("Document is being printed");
)
Windows onafterprint Event
Windows onafterprint Event
This attribute works in IE and Mozilla
function myfun() (
alert("Document is being printed");
)
Windows onafterprint Event
Windows onafterprint Event
This attribute works in IE and Mozilla
function myfun() (
alert("Document is being printed");
)
Выход:
- onbeforeprint: работает перед печатью. Событие запускается после процесса печати. Ниже приведен пример кода.
Код:
body (
color: #9370DB;
background-color: #BC8F8F;
text-align: center;
padding: 20px;
)
p (
font-size: 2rem;
)

Attribute Demo
body (
color: #9370DB;
background-color: #BC8F8F;
text-align: center;
padding: 20px;
)
p (
font-size: 2rem;
)
Attribute Demo
body (
color: #9370DB;
background-color: #BC8F8F;
text-align: center;
padding: 20px;
)
p (
font-size: 2rem;
)
Attribute Demo
body (
color: #9370DB;
background-color: #BC8F8F;
text-align: center;
padding: 20px;
)
p (
font-size: 2rem;
)
Attribute Demo
триггер для печати.
function get () (
document.body.style.background = "# 00BFFF";
)
Выход:
- onerror: эта функция срабатывает, когда выдается ошибка, когда элемент не существует.
Код:

Привет, мир.
function myFun () (alert («проблема с загрузкой изображения.»);
)
Выход:
- onload: эта функция помогает в загрузке объекта и хорошо работает, чтобы увидеть, правильно ли загружена веб-страница.
Код:
onload event demo
function ldImg() (
alert("image loaded without error");
)
Выход:

- onresize: это событие вызывается, когда размер окна браузера изменяется, и любой элемент может быть активирован с помощью атрибута resize.
Код:
onresize event
function cmg() (
alert('welcome to educba');
)
window.onresize = cmg;
onclick="alert(window.onresize);">
Выход:
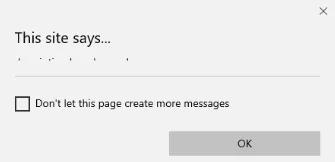
- onunload: это событие вызывается, когда окно веб-страницы закрывается или когда пользователь покидает веб-страницу. Приведенный ниже код выгружает страницу, когда пользователь уходит, и выдает предупреждение, спасибо за поиск. Это событие иногда работает во всех браузерах.
Код:
Welcometo educba tutorial
Welcometo educba tutorial
Welcometo educba tutorial
Покинуть страницу.
function onfunc () (alert («Спасибо за поиск!»);
)
Выход:

2. Форма событий
Работает с формой Controls. Ниже приведены атрибуты, возникающие при взаимодействии пользователя с браузерами.
- onblur: это событие происходит, когда внимание пользователя находится за пределами окна формы. В следующем примере ввод вводится в нижнем регистре, а при нажатии кнопки отправки он превращает вывод в верхний регистр.
Код:
Form onblur
body (
text-align:center;
)
h1 (
color:pink;
)

EDUCBA
onblur="myfunc()">
Submit
function myfunc() (
var a = document.getElementById("aaa");
a.value = a.value.toUpperCase();
)
Form onblur
body (
text-align:center;
)
h1 (
color:pink;
)
EDUCBA
onblur="myfunc()">
Submit
function myfunc() (
var a = document.getElementById("aaa");
a.value = a.value.toUpperCase();
)
Form onblur
body (
text-align:center;
)
h1 (
color:pink;
)
EDUCBA
onblur="myfunc()">
Submit
function myfunc() (
var a = document.getElementById("aaa");
a.value = a.value.toUpperCase();
)
Form onblur
body (
text-align:center;
)
h1 (
color:pink;
)
EDUCBA
onblur="myfunc()">
Submit
function myfunc() (
var a = document.getElementById("aaa");
a.value = a.value.toUpperCase();
)
Выход:

- onchange: это событие происходит, когда пользователь изменяет существующий элемент в форме. Это происходит, когда элемент теряет фокус.
Код:
HTML onchange
select the dress color
pink
Yellow
White
Примечание: выберите любой вариант
Опишите себя вкратце:Разместить
Выход:
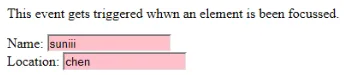
- onfocus: этот атрибут включается, когда пользователь уделяет внимание элементу на веб-странице или когда фокус ввода находится в фокусе. Пример ниже подсвечивается, когда мы вводим ввод в поле.
Код:
Это событие срабатывает, когда элемент находится в фокусе.
Имя:Место расположения:
функция onfoc (a) (
document.getElementById (a) .style.background = "pink";
)
Выход:
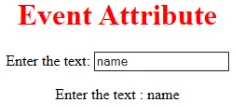
- oninput: это событие срабатывает, когда ввод вводится в поле ввода. Он активируется при изменении значения в текстовом поле. Он отражает, как только значение элемента изменяется.
HTML oninput

body (
text-align:center;
)
h1 (
color:red;
)

Event Attribute
Enter the text:

function myon()
(
var x = document.getElementById("EDUCBA").value;
document.getElementById("sid").innerHTML = "Enter the text : " +x;
)
HTML oninput
body (
text-align:center;
)
h1 (
color:red;
)
Event Attribute
Enter the text:
function myon()
(
var x = document.getElementById("EDUCBA").value;
document.getElementById("sid").innerHTML = "Enter the text : " +x;
)
HTML oninput
body (
text-align:center;
)
h1 (
color:red;
)
Event Attribute
Enter the text:
function myon()
(
var x = document.getElementById("EDUCBA").value;
document.getElementById("sid").innerHTML = "Enter the text : " +x;
)
HTML oninput
body (
text-align:center;
)
h1 (
color:red;
)
Event Attribute
Enter the text:
function myon()
(
var x = document.getElementById("EDUCBA").value;
document.getElementById("sid").innerHTML = "Enter the text : " +x;
)
Выход:

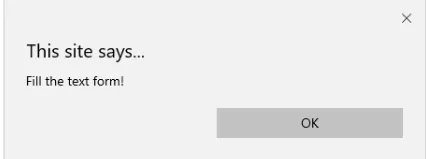
- oninvalid: этот атрибут вызывает события, когда текст, введенный в тип ввода, недопустим или остается пустым. Этот атрибут события должен заполнять элемент ввода.
Код:
example oninvalid Event
p (
color:orange;
)
body (
text-align:center;
)
HTML используется для создания веб-страницы
Введите имя:Выход:

- onreset: запускается, когда форма отдыхает. В следующем примере говорится, что когда вы отправляете кнопку, форма обрабатывается, и снова, когда вы нажимаете для сброса, форма сбрасывается.
Код:
body (font-family:calibri;)
label (font-variant:small-caps;)
ol (background-color:#610000; margin-top:35px;)
li (margin-top:3px; padding:3px; background-color:rose; font-size:15px;)
div (position:absolute;top:250px;left:70px; font-size:1.5em;
)
Form with input to reset and submit
Enter input:
function onInva() (
alert("Input field cannot be empty!");
)
function onInp() (
var input_value = document.getElementById("iv").value;
document.getElementById("a_box").innerHTML = "Input value:
" + iv;
)
function onRes() (
alert("form is reset!");
)
function onSubmitEvent() (
alert("Form is loading");
location.reload();
)
Выход:
- onsearch: работает, когда пользователь нажимает кнопку ввода.
Код:
Пишите в поле.
function myF () (
var k = document.getElementById ("value1");
document.getElementById ("sample"). innerHTML = "Элемент поиска:" + k.value;
)
Выход:

- onselect: срабатывает, когда текст выделен в поле ввода. Выдает диалоговое окно с выводом предупреждающего сообщения.
Код:
onselect demo
h1 (
color:magenta;
)
body (
text-align:center;
)

function eduhtml() (
alert("text highlighted!");
)

EDUCBA Online tutorial
Text Box:
onselect demo
h1 (
color:magenta;
)
body (
text-align:center;
)
function eduhtml() (
alert("text highlighted!");
)
EDUCBA Online tutorial
Text Box:
onselect demo
h1 (
color:magenta;
)
body (
text-align:center;
)
function eduhtml() (
alert("text highlighted!");
)
EDUCBA Online tutorial
Text Box:
onselect demo
h1 (
color:magenta;
)
body (
text-align:center;
)
function eduhtml() (
alert("text highlighted!");
)
EDUCBA Online tutorial
Text Box:
Выход:

- onsubmit: целью этого события является выполнение действия, выполняемого при нажатии кнопки отправки.
Код:
Onsubmit Example
Enter name:
Email :
function myF() (
alert("The form was submitted");
)
Выход:
3. Атрибуты Правления
- OnKeyDown: запускается, когда пользователь нажимает клавишу со стрелкой вниз.
Код:
Пример для Onkeydown.
function mykedwn () (
оповещение («нажатие клавиши активировано»);
)
Выход:
- OnKeyPress: это событие срабатывает, когда пользователь нажимает любую клавишу на клавиатуре. Примечание. Некоторые браузеры не поддерживают нажатие клавиш.
Код:
Этот пример показывает, когда пользовательский тип в текстовой области вызывает событие
>Выход:

- OnKeyUp: этот атрибут срабатывает, когда пользователь отпускает курсор из текстового поля. Ниже идет демонстрация.
Код:
В этом примере символ преобразуется в нижний регистр.
Заполните имя:function mykey () (
var g = document.getElementById ("jjj");
g.value = g.value.toLowerCase ();
)
Выход:

4. Атрибуты событий мыши
Это действие вызывает событие мыши, когда мышь нажимают на компьютере или на внешнем устройстве, например на смартфоне или планшете. Некоторые из событий мыши приведены ниже:
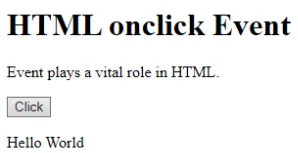
- onclick: запускается, когда пользователь нажимает кнопку мыши. Ниже приведен пример ввода, чтобы показать событие при щелчке мышью.
Код:
HTML onclick Event
HTML onclick Event
HTML onclick Event
Событие играет жизненно важную роль в HTML.
щелчокfunction oncf () (
document.getElementById ("sample"). innerHTML = "Hello World";
)
Выход:
- onmousemove: запускается, когда мышь перемещается над изображением в любом направлении.
Код:
Event onmousemove demo
Это событие активируется, когда указатель перетаскивает свое направление.
Образец текстаВыход:
- Onmouseup: это событие дает уведомление, когда пользователь отпускает кнопку на выходе.
Код:
body (
color: "#ff0000";
height: 120vh;
background-color: #610000;
text-align: center;
)
.polygon (
float: right;
shape-inside: polygon(0 0, 0 200px, 100px 200px);
clip-path: polygon(0 0, 0 250px, 100px 300px);
height: 200px;
width: 200px;
background: linear-gradient(to bottom left, #7CFC00, #8B008B);
)
p (
margin: 30px auto;
)

HTML onmouseup Demo
body (
color: "#ff0000";
height: 120vh;
background-color: #610000;
text-align: center;
)
.polygon (
float: right;
shape-inside: polygon(0 0, 0 200px, 100px 200px);
clip-path: polygon(0 0, 0 250px, 100px 300px);
height: 200px;
width: 200px;
background: linear-gradient(to bottom left, #7CFC00, #8B008B);
)
p (
margin: 30px auto;
)
HTML onmouseup Demo
щелкните ниже объекта
function mupFn () (document.querySelector ('. polygon'). style.transform = 'scale (2.2)';
)
Выход:

- Onmouseover: выполнение JavaScript при наведении указателя мыши на изображение
Код:
Example demonstrating Onmouseover.
Mouse over
function A() (
document.getElementById("sample").style.color = "yellow";)
function B() (
document.getElementById("sample").style.color = "green";
)
Example demonstrating Onmouseover.
Mouse over
function A() (
document.getElementById("sample").style.color = "yellow";)
function B() (
document.getElementById("sample").style.color = "green";
)
Example demonstrating Onmouseover.
Mouse over
function A() (
document.getElementById("sample").style.color = "yellow";)
function B() (
document.getElementById("sample").style.color = "green";
)
Example demonstrating Onmouseover.
Mouse over
function A() (
document.getElementById("sample").style.color = "yellow";)
function B() (
document.getElementById("sample").style.color = "green";
)
Выход:
5. Перетащите атрибуты событий
Это приложение помогает в окне HTML, когда пользователь перетаскивает элемент ввода. Ниже приведены различные прослушиватели событий, используемые в HTML для хранения перетаскиваемых данных.
- Ondrag: используется, когда элемент перетаскивается с веб-страницы.
- Ondragstart : запускается, когда пользователь начинает перетаскивать из поля ввода. Пример ниже демонстрирует перетаскивание области с двумя целями.
Код:
#b1, #b2 (
float:left;padding:11px;margin:11px; -moz-user-select:none;
)
#b1 ( background-color: #FF6699; width:65px; height:85px; )
#b2 ( background-color: #808000; width:180px; height:180px; )

function dStart(e) (
e.dataTransfer.effectAllowed = 'move';
e.dataTransfer.setData("Text", e.target.getAttribute('id'));
e.dataTransfer.setDragImage(e.target, 0, 0);
return true;
)


Drag demo
Drag the box.
ondragstart = "return dStart(e)">
Drag it
welcome
#b1, #b2 (
float:left;padding:11px;margin:11px; -moz-user-select:none;
)
#b1 ( background-color: #FF6699; width:65px; height:85px; )
#b2 ( background-color: #808000; width:180px; height:180px; )
function dStart(e) (
e.dataTransfer.effectAllowed = 'move';
e.dataTransfer.setData("Text", e.target.getAttribute('id'));
e.dataTransfer.setDragImage(e.target, 0, 0);
return true;
)
Drag demo
Drag the box.
ondragstart = "return dStart(e)">
Drag it
welcome
Выход:

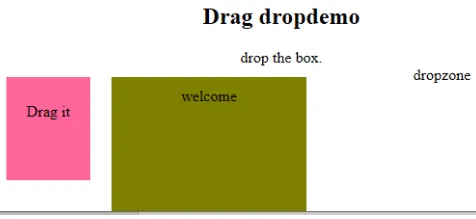
- ondrop: Выполнить этот атрибут, когда перетаскиваемый элемент отбрасывается в элемент.
Код:
#b1, #b2 (
float:left;padding:11px;margin:11px; -moz-user-select:none;
)
#b1 ( background-color: #FF6699; width:65px; height:85px; )
#b2 ( background-color: #808000; width:180px; height:180px; )

function dStart(e) (
e.dataTransfer.effectAllowed = 'move';
e.dataTransfer.setData("Text", e.target.getAttribute('id'));
e.dataTransfer.setDragImage(e.target, 0, 0);
return true;
)


Drag dropdemo
drop the box.
ondragstart = "return dStart(e)">
Drag it
ondrop="drop(event)"
ondragover="allowDrop(event)">
welcome
dropzone
Выход:
Вывод
Этот атрибут события помогает сделать веб-приложение очень простым и привлекательным. Различное возникновение действий порождает различные события. Хотя такого подхода обычно избегают, но программисту нравится изучать функцию, назначенную для событий атрибутов HTML, и эти обработчики событий по-прежнему выполняются для украшения веб-страниц.
Рекомендуемая статья
Это руководство по атрибутам событий HTML. Здесь мы обсуждаем Введение в атрибуты событий HTML, а также реализацию и вывод кода. Вы также можете просмотреть наши предлагаемые статьи, чтобы узнать больше -
- Краткое введение в рамки HTML
- Изменение атрибута стиля HTML
- Приложения HTML | Топ 10 использует
- 10 лучших отличий HTML от HTML5 (Инфографика)
- Бросок против бросков | 5 главных отличий, которые вы должны знать
- Установить цвет фона в HTML с примером